As previously advised there hasn't been much hobby related activity recently (although watch this space for the return of wargaming to the lower Wharfe Valley, following a message from James which included the instruction to forget everything we know because he has changed the rules), but I have been inspired by the excellent Tin Soldiering On blog to do some modelling. That link should take you a post about sticking bits of cardboard onto plastic soldiers in an Airfix Magazine stylie, and it gave me the irresistible urge to do some scratch building. I decided to make a second German 17cm minenwefer. Naturally I don't need one; indeed I have no rules that differentiate these from the smaller 7.58cm version of which I have many. But, as someone once said, what's that got to do with the price of fish?
The completed model I already have (and previously mentioned here) looks like this, with apologies for the excess flash lighting:
First step is to get a scale diagram from the internet and print it out. Obviously I would both like to give credit to whoever produced it and point you to it, but I originally downloaded it a year or so back and now can't for the life of me find the website again. Should anyone want a copy then ask and I'll send you one. With no expense spared I have glued it on to the back of an empty tissue box.
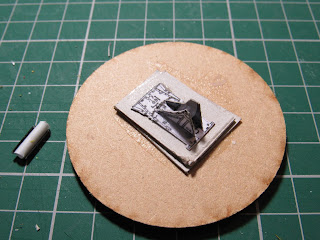
I then cut out the base plate and the two side pieces. Also required is an appropriate length of 3mm plastic tube and two pieces of stiff wire, all measured from the drawing.
The base is glued on to, as it happens, the base. The layers of cardboard are to raise it to approximately the level of the crew, who will of course be on, well, bases, thus making eventual application of filler easier. The two pieces of wire are fixed to the side of the tube.
The side pieces are glued in an upright position to the base. I use UV activated glue for all this as I find superglue impossible to cope with (see previous postings for details). The stuff used to be really expensive, but now isn't; I get mine from eBay.
The barrel is glued at an appropriately jaunty angle and a thin strip of cardboard is glued along the back edge of the baseplate. Details such as sights and controls (I tend to the impressionistic rather than the strictly accurate) are added in plasticine, hardened with an acetate based nail varnish. Please don't bother telling me that Donald Featherstone used banana oil; I know that he did and I also know that banana oil is an acetate.
At this stage one looks for suitable crew, finds one doesn't have any left and places an order online. Readers may choose to perform this step earlier if they wish.
For various technical reasons reporting on painting the model will be deferred.


That's a good looking scratch build,I'm always thrown when I see wargaming content on your blog,I look forward to the painted and crewed finish article!
ReplyDeleteBest Iain
Thank you. Despite appearances I do actually rather enjoy wargaming and the associated bits and pieces; must try to do more of it.
Delete